The 7 Days to Die Database
7 Days to Die Console Commands
Everything you need to know about cheats and console commands in 7 Days to Die on PC and Mac (Steam and non-Steam versions).


Everything you need to know about cheats and console commands in 7 Days to Die on PC and Mac (Steam and non-Steam versions).
Press F1 to open the console. If that doesn't work, try " , @ , Ö , Ø , F2 and Ñ .
Type a command into the console and hit ENTER to use it.
Below you can find a searchable list of all 70 7 Days to Die cheats.
Pressing the "Discover", "Table" and "Card" buttons on the command list will change how commands and cheats are displayed. Use the search box below to instantly search our database of 7 Days to Die admin commands.
| Cheat | Description |
|---|---|
| giveself | Gives you the specified item at the specified quality level. |
| buff | Gives you the buff with the specified ID. |
| debuff | Removes the buff with the specified ID. |
| creativemenu | Enables the Creative Menu, press the |
| spawnsupplycrate | Spawns a supply crate at your current location. |
| weather | Changes the world's weather to the specified type. Replace any value between |
| givequest | Completes the specified quest. |
| removequest | Uncompletes the specified quest. |
| giveselfxp | Gives you the specified amount of experience. |
| Command | Description | Syntax |
|---|---|---|
| giveself | This console command will spawn the item with the specified item ID in front of your character. You can optionally specify a quality level for the spawned item. Find a list of all item IDs at commands.gg/7dtd/items. | giveself < Item ID > < Quality Level (1-6) > |
| buff | This console command gives you the specified buff. Use buffplayer to give a buff to another player. | buff < Buff ID > |
| debuff | This admin command removes the buff with the specified ID from you. Use debuffplayer to remove a buff from another player. | debuff < Buff ID > |
| buffplayer | This command will add the buff with the specified ID to the player you specify. You can specify a player by their Steam ID, name, or entity ID. | buffplayer < Steam ID / Player Name / Entity ID > < Buff ID > |
| debuffplayer | This console command will remove the specified buff from the specified player or entity. | debuffplayer < Steam ID / Player Name / Entity ID > < Buff ID > |
| switchview | This command toggles first/third person mode - i.e. if you are in first person mode when you type this command, you'll be switched to third person (and vice versa). | switchview |
| systeminfo | This command will print to the console information about the computer you are using to play 7 Days to Die. The information is technical information like your computer's hardware, operating system, etc. | systeminfo |
| debugmenu | This command enables ('debugmenu on') and disables ('debugmenu off') Debug Mode. In Debug Mode, you can enable god mode by pressing the G key on your keyboard, and access the debug menu by pressing ESC. | debugmenu |
| exhausted | This cheat will make your character exhausted. | exhausted |
| giveselfxp | This cheat code will give you the specified amount of XP. | giveselfxp < XP Amount > |
| creativemenu | This cheat toggles (enables and disables) the Creative Menu. With this command turned on, you can access the Creative Menu by pressing the U key. | creativemenu |
| spawnsupplycrate | This console command will spawn a Supply Crate at your current location. | spawnsupplycrate |
| admin | This admin command will add or remove a player from the admin list. When adding a player to the admin list, you need to specify a permission level. A permission level is a number between 0 and 1000 that determines what permissions a player has - 1000 is the lowest (no permissions) and 0 is the highest (full admin permissions). By default, commands like admin, and shutdown require a permission level of 0 to use - and kick, and ban require a permission level of 1. Use the 'cp list' command to see what commands are assigned to each permission level. | admin < 'add' / 'remove' / 'list' > < Steam ID / Player Name / Entity ID > < Permission Level > |
| kick | This admin command will kick the player with the specified name, Steam ID, or entity ID from the server with an optional kick message. Note that kicking isn't the same as banning - this will disconnect the player from the server, but they will be able to reconnect. | kick < Steam ID / Player Name / Entity ID > < "Kick Message" > |
| kickall | This admin command will kick all players from the server with an optional kick message (that will be shown to them when they are disconnected). | kickall < "Kick Message" > |
| whitelist | This admin command will add a player to the whitelist, remove a player from the whitelist, or list all players on the whitelist. The whitelist is a list of players who are allowed to connect to the server. The whitelist is disabled if no players are on the whitelist, but if there is at least one player on the whitelist it is enabled - i.e. to enable the whitelist, simply add a player to it; to disable the whitelist, remove all players from it. | whitelist < 'add' / 'remove' / 'list' > < Steam ID / Player Name / Entity ID > |
| ban | This admin command can be used to list all banned players, or ban/unban a specified player. When banning a player, you need to specify a duration (see duration argument information for help). You can optionally specify a ban message (reason) when banning a player. | ban < 'add' / 'remove' / 'list' > < Steam ID / Player Name / Entity ID > < Duration + Duration Unit > < "Message" > |
| killall | This console command will, as you might've guessed from the name, kill every player on the server. It will also kill all zombies/entities. | killall |
| teleport | This console command can be used to teleport your character to a desired location. You can do one of the following: teleport to another player, teleport to a set of coordinates, or move yourself a set amount of coordinates left/right/up/down/forward/backwards (offset). See argument information for more help. | teleport < Steam ID / Player Name / Entity ID > < X Y Z > < offset X Y Z > < View Direction > |
| teleportplayer | This console command can be used to teleport another player to a location. Using this command, you can do one of these three things: teleport a player to another player, teleport a player to a set of coordinates, or move a player a set amount of coordinates in any direction(s) (offset). | teleportplayer < Steam ID / Player Name / Entity ID > < Steam ID / Player Name / Entity ID > < X Y Z > < View Direction > |
| showclouds | This console command will set your game's clouds to the specified cloud texture. The cloud texture should be located in resources/textures/environment/spectrums/default. Typing this command with any arguments will restore cloud textures to default. | showclouds < Texture File Name > |
| repairchunkdensity | This command will check for mismatches within a chunk (specified by coordinates). If you specify 'fix' (without quotes) at the end of this command, the game will attempt to repair any mismatches found within the specified chunk. | repairchunkdensity < X Z > < 'fix' > |
| weather | This command changes the world's weather to the weather you specify. | weather < Weather Setting > |
| weathersurvival | This command will enable ('on') or disable ('off') weather disable for your game. | weathersurvival < 'on' / 'off' > |
| spawnentity | This command will spawn an entity specified by its entity ID (at the location of the player with the player ID specified). Typing this command without any arguments ('spawnentity' on its own) will print a list of all entity IDs. Use 'listplayerids' to print a list of all player IDs. | spawnentity < Player ID > < Entity ID > |
| spawnwanderinghorde | This command will spawn a wandering horde of zombies. | spawnwanderinghorde |
| givequest | This cheat will give yourself the quest with the specified quest ID. | givequest < Quest ID > |
| removequest | This cheat will remove the quest with the specified quest ID from you. | removequest < Quest ID > |
| say | This command will send a message in chat to all players connected to the server (under the chat name "Server"). | say < "Message" > |
| cp | This command can be used to list, remove, add, and change permission levels for different commands. A permission level is a number between 0 and 1000 that determines what permissions a player has - 1000 is the lowest (no permissions) and 0 is the highest (full admin permissions). By default, commands like admin, and shutdown require a permission level of 0 to use - and kick, and ban require a permission level of 1. Use 'cp list' to see a list of all permission levels - if a command doesn't have a permission level set, it requires max permissions (0) to use. See argument information for help adding/removing/changing permissions. Player permission levels can be changed with the admin command - all players by default have a permission level of 1000. | cp < 'add' / 'remove' / 'list' > < Command > < 0 - 1000 > |
| listplayers | This command will print out a list of all players connected to the server with the following information: entity ID, name, coordinates, rotation, whether they are local or remote, health, deaths, zombies they've killed, player's they've killed, score, level, steam ID, IP, and ping. | listplayers |
| version | This admin command will print the version of the game you are running, along with any mods you have installed. | version |
| water limit | This command can be used to limit how many water flow updates can run at a time. | water limit < Amount > |
| thirsty | This console command will make you thirsty. | thirsty |
| spectrum | This console command will set the game's lighting spectrum (how the sky looks and what light it produces) to the specified spectrum. | spectrum < Spectrum ID > |
| gettime | This command will tell you the current game time, including the date and the day that it is in your game. | gettime |
| spawnscouts | This console command will spawn scouting zombies. To spawn the zombies near you, use the command 'spawnscouts' on its own. To spawn near another player specify their steam ID, entity ID, or name. You can also spawn the zombies at specified X Y Z coordinates. | spawnscouts < Steam ID / Player Name / Entity ID > < X Y Z > |
| listents | This admin command will list all entities currently in the game. Entities include players, zombies, and other living things. Similar to the listplayers command with regard to the information that it provides (e.g. health, etc). | listents |
| shutdown | This admin command will shut the game down. | shutdown |
| spawnairdrop | This command will spawn an air drop - note that this won't necessarily be at your current location (it can be anywhere in the map). | spawnairdrop |
| staticmap | This console command will switch your map between static and dynamic mode when playing on the Navezgane map. | staticmap |
| listplayerids | This command will list all players connected to the server, along with their entity IDs. | listplayerids |
| setgamestat | This command will set the specified game stat to the specified value. Use getgamestat for a list of all game stats. | setgamestat < Game Stat > < Value > |
| getgamestat | This command will print a list of all game stats, or if you specify a search term, game stats containing that term. | getgamestat < String > |
| setgamepref | This console command sets the specified game preference to the specified value. | setgamepref < Game Preference > < Value > |
| getgamepref | This command prints a list of all game preferences to the console. You can optionally specify a search term to only show game preferences containing that string. | getgamepref < String > |
| starve | This command will make you starve. | starve |
| settempunit | This command can be used to change the temperature unit used by the game to Celsius ('C') or Fahrenheit ('F'). | settempunit < C / F > |
| memcl | This command will print memory (RAM) information about the CLIENT to the console, including free memory, the heap size, and more. It will also call the garbage collector to try to free up RAM. | memcl |
| mem | This command will print memory (RAM) information about the SERVER to the console, including free memory, the heap size, and more. It will also call the garbage collector to try to free up RAM. | mem |
| traderarea | This command will print a list of all Trader Areas in the game, including their coordinates. | traderarea |
| exportitemicons | This command will export all item icons for 7DTD as PNGs and save them in the ItemIcons folder. | exportitemicons |
| lights | This command will enable and disable (toggle) light debug mode. The regions that most sources of light affect will be colored green. | lights |
| shownexthordetime | This command will show you the wandering horde time. | shownexthordetime |
| pplist | This command will print a list of all PersistentPlayer data. | pplist |
| clear | This command will clear all messages and text from the console. | clear |
| listthreads | This console command lists all threads that the game is currently using. | listthreads |
| spawnscreen | This command will play the spawn screen effect (i.e. blur your screen and lower the constrast). | spawnscreen |
| showalbedo | This command enables and disables (toggles) the display of albedo in gBuffer. | showalbedo |
| settime | This console command sets the time in the game. You can use this to set the time to: night, day, or to a specific day/time (e.g. day 3, 14:43). | settime < 'day' / 'night' > < 0-24000 > < d hh mm > |
| help | This command prints a list of all console commands to the console. If you specify a command as an argument, it will print help for that specifiy command. | help < Command > |
| sounddebug | This command enables and disables (toggles) SoundManager debug output. | sounddebug |
| shownormals | This command enables and disables (toggles) the display of normal maps in gBuffer. | shownormals |
| loggamestate | This command will log client (true) or server (false) information about the game to the 7DaysToDieDataoutputlog.txt file with the specified header. | loggamestate < Header > < true / false > |
| chunkcache | This console command will display all of the chunks that are loaded in the cache. | chunkcache |
| loglevel | This command will enable or disable log messages for the specified log level. This command can be used to hide log messages that are info, but show log messages that are errors. | loglevel < Log Level > < true / false > |
| saveworld | This command will force a save of your current world. | saveworld |
| showchunkdata | This console command will print information about the chunk you are currently standing in - e.g. memory used, entities within, etc. | showchunkdata |
| aiddebug | This command enables and disables (toggles) AIDirector debug output. | aiddebug |
| showspecular | This command will enable or disable (toggle) the display of specular values in gBuffer. | showspecular |
7 Days to Die is an epic game. If you didn't think it could get any better and don't know about console commands, you're in for a shock. Why? Because console commands (also known as cheat codes) completely change up the way the game is played. Using console commands, you can spawn items, create huge hordes of zombies, change the sky to Blood Moon, among many other things - the possibilities are endless. Changing the way the game is played in dramatic ways isn't for everyone, so you should be might to hear that the console can also be used to fix bugs, or assist with modding. But that's enough of us blabbing on about how great the console is - we'll get to explaining how you can open and use it below.
Think of the console as a text box that you can open with a hotkey. And think of console commands as words that are typed into the console that "do things". You can open the console by pressing one of the following hotkeys on your keyboard:
F1 " @ Ö Ø F2 Ñ The console should look like this once it's open:
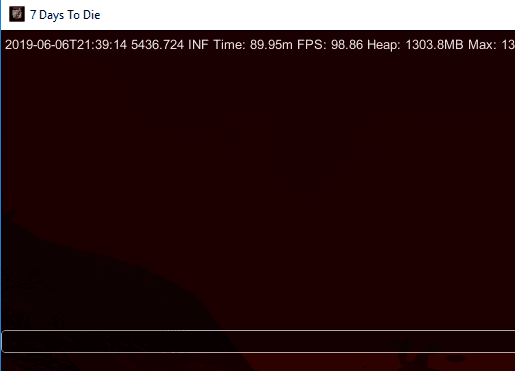
After getting the console open, all you have to do is type a command into it and hit ENTER to send it!
If you're looking for an example to get you started, you can change the color/setting of the scene with the spectrum command. There are many options, which you can view here, but for this example, we'll make the scene foggy. The command to make the scene foggy is:
All you'd have to do is type the above text into the console, hit ENTER , and your game will be foggy! You can turn your scene back to its default setting with:
If you're looking for more commands and cheat codes to use with the console, fear not! We have a searchable list of 70 with detailed help and examples, simply click here or scroll up the page to view it!